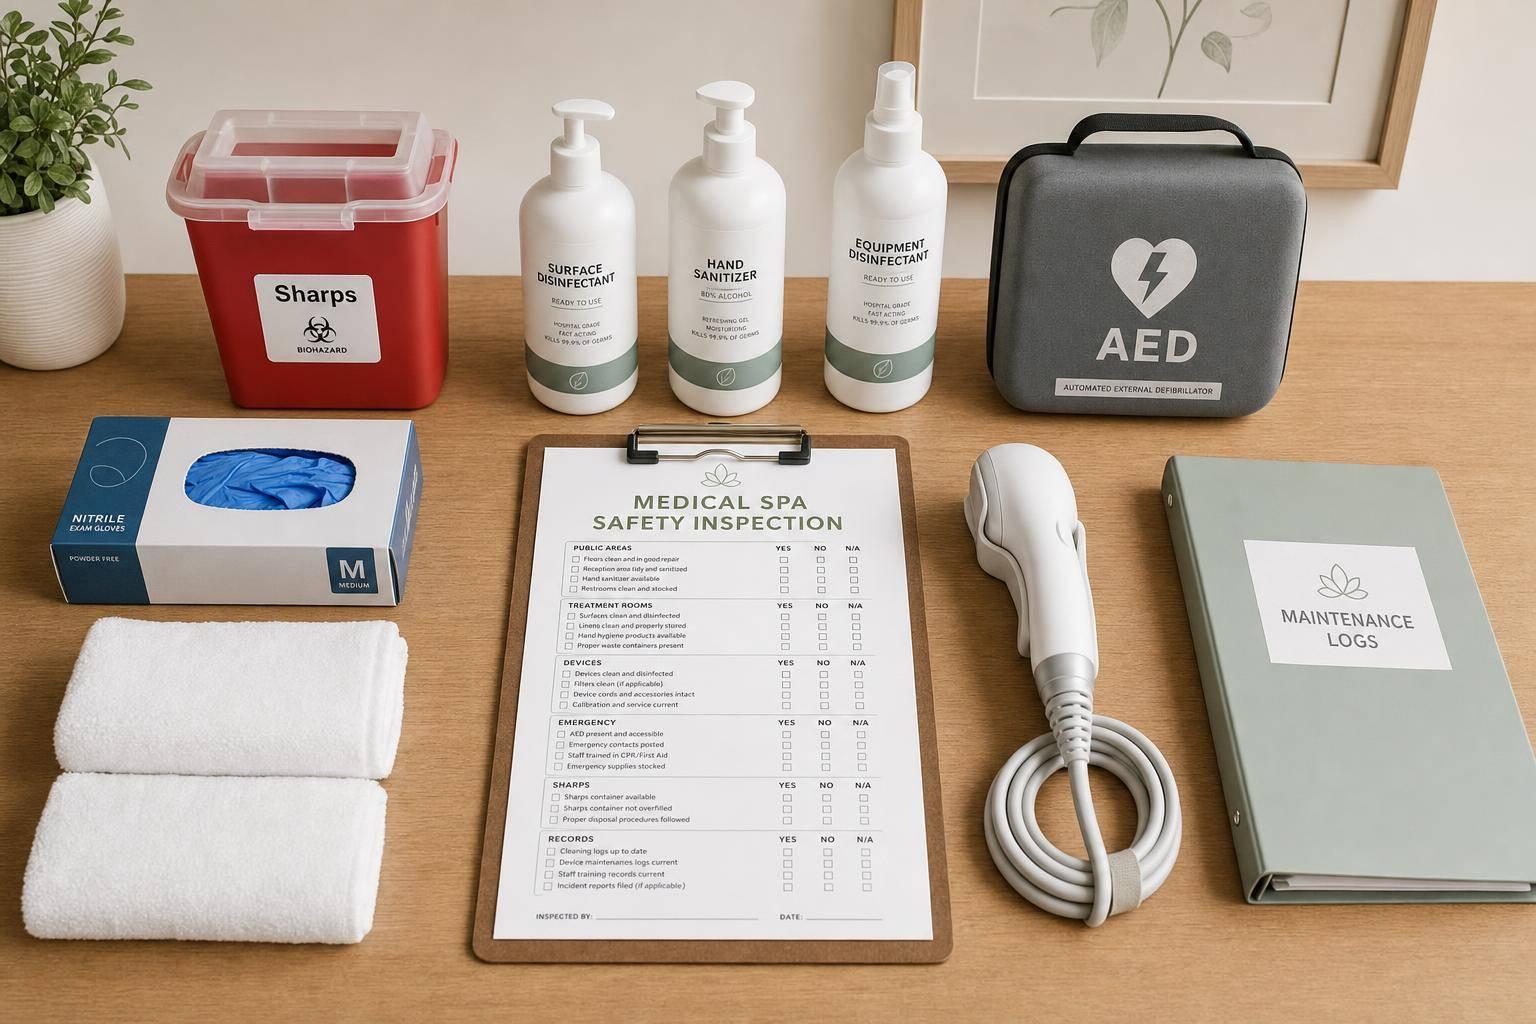

A med spa safety check should answer one question fast: Is the site safe for patients, staff, and records today? I’d look at 4 main things right away: public-area hazards, treatment-room cleaning, device and emergency-readiness checks, and proof in logs and staff files.
Here’s the short version:
-
Start at the front desk and waiting room
- Check for slip and trip risks
- Make sure exits are clear and lit
- Keep patient forms and screens out of public view
-
Move into treatment rooms
- Confirm surfaces are cleaned between patients
- Check sinks or hand sanitizer at point of care
- Make sure PPE is stocked and not expired
-
Review devices, sharps, and emergency gear
- Look for service records on lasers, IPL, and RF devices
- Replace sharps containers at 3/4 full
- Confirm AED pads, batteries, oxygen, and epinephrine are current
-
Finish with records and staff files
- Match what I saw in rooms to cleaning and disinfection logs
- Make sure SDS sheets are current and easy to find
- Verify licenses and annual safety training are on file
A missed log, a blocked exit, or an overfilled sharps container can turn into a patient-safety issue fast. So the article lays out a simple walk-through: public spaces first, clinical rooms next, paperwork last, then corrective actions with owners and due dates.
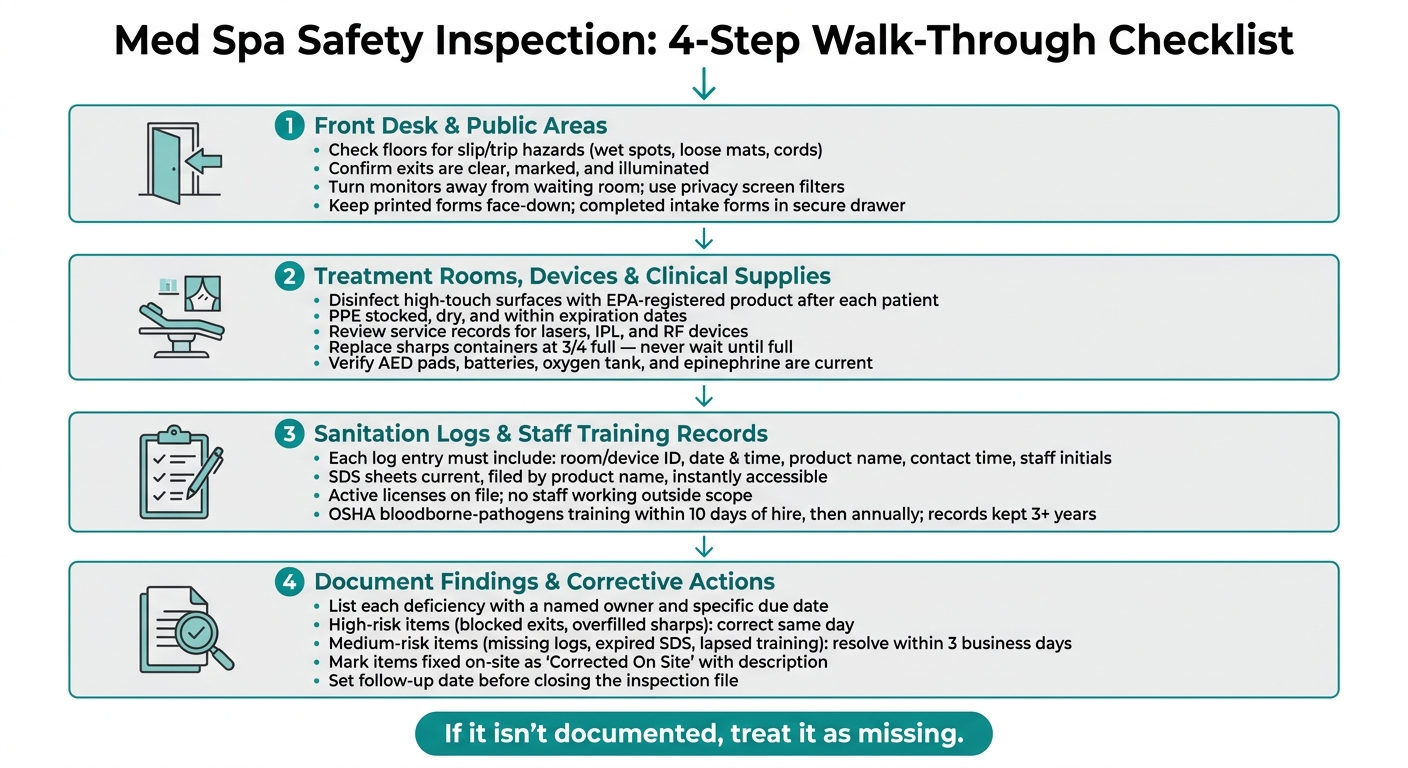
Med Spa Safety Inspection Checklist: 4-Step Walk-Through
Step 1: Inspect the Front Desk and Public Areas
Start with the public areas. Slip risks, blocked exits, and exposed patient information often cause safety and privacy problems before you even get to a treatment room.
Reception Area Hazards, Exits, and Signage
Walk through the reception and waiting area the way a patient would, from the front door to the check-in desk. Pay close attention to entrance transitions, changes in flooring, loose mats, cords, and any other spot where someone could slip.
Check the floors for wet spots, loose mats, curled rug edges, exposed electrical cords, and clutter. If anything crosses a walkway, secure it or move it. Test chairs and side tables too. A wobbly chair may seem minor, but it can put patients at risk, especially older adults.
Then check every exit. It should be clearly marked, free of obstructions, and easy to open from the inside without a key or special tool. OSHA requires exit routes to stay free of materials, equipment, locked doors, dead-end corridors, decorations, and other obstacles that could slow an evacuation. If a door is not an exit, label it "Not an Exit" or mark it with its actual use. Exit signs need to stay illuminated, and emergency lighting needs to work during a power outage.
Train front-desk staff so they can point patients to the nearest exit right away.
Front-Desk Privacy and Records Access
Once you've checked physical risks, look at what patients can see and what staff can get to.
HIPAA does not require a private front desk. It does require reasonable privacy safeguards. In plain terms, that means turning monitors away from the waiting room, using privacy screen filters, and keeping printed schedules or reports face-down when staff are not using them. Completed digital intake forms should go straight into a secure drawer, not sit in a stack on the counter where the next patient can read them. Staff should also keep their voices low enough to limit exposure.
| Document | Where It Should Be | Who Needs Access |
|---|---|---|
| Facility & practitioner licenses | Displayed or in compliance binder | All front-desk staff |
| Safety binder (emergency procedures, incident forms) | Near front desk, clearly labeled | All front-desk staff |
| SDS sheets for chemicals | Accessible to staff in the work area | All staff in the work area |
| Prior inspection records | Compliance binder or digital system | Manager, front-desk lead |
Next, move into treatment rooms and check room turnover, devices, sharps disposal, and emergency supplies.
sbb-itb-02f5876
Step 2: Check Treatment Rooms, Devices, and Clinical Supplies
Treatment rooms are where patient safety is most directly affected by cleaning, equipment condition, and waste handling.
Treatment Room Cleanliness and Turnover
Start by looking at the room the way a patient would. Floors should be clear. Counters should be uncluttered. There shouldn't be spills, dust, loose cords, or debris. Keep only a small number of nonessential items on counters to lower contamination risk.
After each patient, remove any visible soil first. Then disinfect high-touch surfaces and procedure equipment with an EPA-registered product, and follow the full contact time listed on the label.
Each room should also have one of the following:
- A sink with warm running water, liquid soap, and disposable paper towels
- Alcohol-based hand rub at or near the point of care
Check dispensers too. They shouldn't be empty or expired.
PPE should be easy to reach, dry, and within expiration dates. That includes exam gloves in multiple sizes, masks, and eye protection. A room-turnover checklist should be posted in every room.
Device Maintenance and Emergency Equipment
Once the room is clean, move to equipment readiness. Review each laser, RF, IPL, and other energy device for a current manual, service history, calibration record, and repair log. Confirm the date of the last service, who did the work, and whether any corrective actions were documented.
Before use, inspect cords, plugs, handpieces, emergency stop buttons, and the right laser eyewear. If a device has visible damage or no service record, take it out of service until it has been cleared.
If your clinic performs injections or other higher-risk procedures, check emergency gear with the same care. Make sure the AED is powered on and has current pads and batteries. Confirm the oxygen tank is secured and has enough pressure. Check that epinephrine vials or auto-injectors are within expiration dates and stored at the right temperature.
Record these checks every month, including the date and staff initials.
Sharps Containers and Biohazard Waste Handling
Sharps containers should be placed at the point of use, within arm's reach of the procedure area. They should be mounted securely or set in a stable holder, kept upright, and closed when not in use.
Replace sharps containers when they are 3/4 full. Don't wait until sharps are close to the opening.
It's also worth separating waste the right way. Sharps go only in puncture-resistant sharps containers. Blood-soaked gauze, contaminated PPE, and other regulated medical waste belong in red biohazard bags labeled with the biohazard symbol, not in sharps boxes. Keep the vendor agreement, pickup manifests, and treatment certificates on file.
Next, review sanitation logs and staff training records.
Step 3: Review Sanitation Logs and Staff Training Records
After the physical walkthrough, shift to the paper trail. You’re checking for proof that cleaning, disinfection, and training actually happened. If it isn’t documented, treat it as missing. Use the room, device, and waste checks from Step 2 to match the records against what you saw on-site.
Cleaning Logs, Disinfection Records, and SDS Access
Each treatment room and each reusable device should have a log completed per procedure or per shift. A solid log entry should show:
- the room or device ID
- the date and time
- the product name and contact time
- the staff member’s initials
That level of detail matters. A vague note like “cleaned” doesn’t tell you when disinfection took place, which product was used, or whether the required contact time was met.
After you confirm the cleaning records, check who is allowed to perform those tasks. Then review Safety Data Sheets (SDS). They should be current, filed by product name, and easy to access for every chemical used on-site, including disinfectants, sterilants, and cleaning agents. SDS files must be current and instantly accessible by product name. If the office switched products but never updated the SDS file, flag it right away.
Licenses, Credentials, and Annual Safety Training
Review staff files for active licenses and documented annual safety training. Make sure no one is working outside their scope. Staff should also be trained for the procedures and devices used on-site.
OSHA requires documented bloodborne-pathogens training within 10 working days of exposure-risk assignment, and then once a year after that. Those records must be kept for at least 3 years. The file should show:
- the training topic
- the date
- the instructor or training source
- an attendance sign-in or acknowledgment from each staff member
Don’t stop at bloodborne pathogens. Check for infection control, PPE use, and exposure-response training too. If any certificate is expired or missing, write down the staff member’s name and assign a due date. When the same gaps keep showing up, that points to a compliance problem.
Using Prospyr to Organize Compliance Records
If your team tracks compliance digitally, keep logs, licenses, and renewal dates in one place. Use Prospyr to centralize compliance records, recurring tasks, and renewal dates so inspections move faster.
Step 4: Document Findings, Fix Problems, and Close the Inspection
Wrap up the inspection by recording each finding, assigning an owner, and setting a due date. Use what you found during the walkthrough and records review to close every open item.
Inspection Status and Corrective Action Table
List each deficiency, then assign ownership and a deadline. Write each corrective action as a clear task. For example, instead of "fix sharps issue", write "replace overfilled sharps container in Procedure Room 2 and record disposal pickup."
| Item | Status | Risk Level | Corrective Action | Owner | Due Date |
|---|---|---|---|---|---|
| Sharps container overfilled in Procedure Room 2 | Open | High | Replace container immediately; record disposal pickup | Lead Nurse | Same day |
| Treatment room log missing 8:00 AM disinfection entry | Open | Medium | Complete entry review; retrain staff member on log protocol | Spa Manager | Within 3 business days |
| Safety data sheet (SDS) file not updated after product switch | Open | Medium | Pull current SDS for new disinfectant; file by product name | Clinical Supervisor | Within 3 business days |
| Exit sign not illuminated in reception hallway | Open | High | Replace bulb; confirm sign is working | Facilities Lead | Same day |
| Staff annual safety training record expired | Open | Medium | Schedule retraining; update file with new completion date | Medical Director | Within 3 business days |
If an item gets fixed during the inspection, mark it as Closed and move the rest to follow-up. High-risk items tied to patient safety, device function, or emergency access should be corrected the same day. Medium- and low-risk items still need a set deadline. If something was handled on-site, note it as "Corrected On Site" and add a short description of what was done.
Conclusion: What a Complete Med Spa Safety Check Should Confirm
Before closing the inspection, do a quick sign-off review with the staff in charge. Confirm which issues were resolved during the walkthrough and which still need follow-up. A signed or time-stamped record gives you a clear audit trail.
No inspection is complete until every open item has an owner and a follow-up date. A completed med spa safety inspection should confirm all of the following:
- Public areas are free of hazards, exits are clear, and required signage is posted
- All devices have current maintenance records and emergency equipment is accessible
- Sharps containers are within fill limits and biohazard waste is labeled and stored correctly
- Every deficiency has a named owner and a specific due date
Set a follow-up date before the inspection file is closed. Open items without a scheduled check-in have a habit of lingering. Keep tasks, due dates, and corrective action records in one place so nothing slips between inspections.
FAQs
How often should a med spa safety inspection be done?
Med spa safety inspections need to happen on a set schedule. That’s how you stay compliant all year, not just when a problem pops up.
A simple cadence looks like this:
- Monthly: sharps disposal, PPE stock, emergency medication expiration dates
- Quarterly: cleaning logs, equipment maintenance records, credential audits
- Annually: clinical SOPs, medical director agreements, HIPAA policies
- Immediately: after adding a new device or procedure
This kind of routine helps teams catch small issues before they turn into bigger ones. For example, a missing PPE item or an expired emergency medication can slip by fast in a busy med spa. A recurring review makes those checks part of normal operations instead of a last-minute scramble.
Who should be responsible for completing the inspection?
Safety inspections are a shared responsibility. The medical director has final authority, gives clinical oversight, and signs off on corrective action plans.
On a day-to-day basis, an infection prevention lead or compliance officer usually handles the work. At the same time, clinical service-line leads keep area-specific equipment logs and competency checklists up to date. Prospyr can help centralize records and automate training reminders.
What should happen if a safety issue is found during the walkthrough?
Take immediate corrective action right away. Remove faulty equipment from service, secure medical waste, or replace expired supplies.
Then document the issue, what was done to fix it, and whether staff need more training. Review the root cause and update SOPs or protocols so the same problem is less likely to happen again. Prospyr can help track corrective actions and keep audit-ready records.